Sunday 28 October 2012

CD SUNDAY CHALLENGE

This week's CD Sunday Challenge is...Beautiful Blue
This is my entry


The card has been created in Serif CAP2 using Debbi Moore's Shabby Chic Music CD.
The guitar topper has been altered using the Transform feature. The music notes were digitally punched from some of the CD's papers in the CAP2 programme and the borders cropped from one of the CD's images.

Wednesday 24 October 2012

NEW DIGIKIT...LAYERED CHRISTMAS TREES

We have a new Digikit released today....Layered Christmas Trees.


This kit has a selection of layers for you to use to create original Christmas Trees.
It includes 36 Frosty Layers, 96 Glitter Layers, 24, Patterned Layers, 54 Special Layers, 51 Outlines, 22 Stars and Instructions / Ideas.
Personal Use Only.
The images are high quality png at 300 dpi.
2 Zipped Folders (which have to be bought separately) 91.7 MB and 106 MB

SAMPLES


FREEBIE
(right click and save)


Sunday 14 October 2012

CD SUNDAY CHALLENGE

This week's CD Sunday Challenge is...Autumn Splendour
This is my entry


The oval background is from Peerless Designs Secret Garden CD and the dahlia is from my
Floral Sketchbook 1 Digikit (coloured digitally see how here).
The beige leafy background is from Joanna Sheen Thomas Kincade CD, decoupaged in CAP2.
The oval rope border is one of CAP2's brushes and the bow from one of the Daisytrail Digikits.
The knotted border is from Pam LeFors as is the pin which has had the middle removed and a small dahlia placed on the pin head.
I should add that dahlias are late flowering plants and so overlap into autumn!


Thursday 11 October 2012

FLORAL SKETCHBOOK PLAYTIME Part 7

The Floral Sketchbook designs can be used to create backgrounds, borders and even bouquets.

Examples


Making a simple background in CAP2: Create a coloured square. Import the lily sketch, copy, paste and resize. Place over the background, rotating the designs until you have a pattern you like. Group together and crop to the edges of the square.


The 'bouquet' was created in CAP2, printed on to inkjet watercolour paper and then coloured with Radiant Rain Shimmering Mists.


A card made using the lily sketch. The lily was coloured with Shimmering Mists and Heirloom Gold Perfect Pearls. The flower centre was embellished with black Liquid Pearls.

Wednesday 10 October 2012

FLORAL SKETCHBOOK PLAYTIME Part 6

If you are using a graphics programme such as CAP2 or MCS there will be a way of turning the
 Floral Sketches to a sepia colour. These can be used as they are, to create greeting's cards or in scrapbook pages or could be tinted with very dilute Radiant Rain Shimmering Mists or watercolour paint.

Examples


Tinted with very dilute Simmering Mists.


Tinted with very dilute Simmering Mists.


Sprayed with Sunflower Yellow Perfect Pearls.


Tuesday 9 October 2012

FLORAL SKETCHBOOK PLAYTIME Part 5

This time some of the Floral Sketchbook designs have been coloured with Pan Pastels.

The design were printed on to inkjet watercolour paper  and cut out.

The Pan Pastels were applied to the designs with a sponge and then a cotton bud for smaller detailed areas.

Examples


Monday 8 October 2012

FLORAL SKETCHBOOK PLAYTIME Part 4

This time some of the Floral Sketches have been coloured with Brilliance ink.

The designs were printed on to inkjet watercolour paper, cut out and sprayed with water before colouring.

The Brilliance inks (lovely pearly colours) were applied by inking a paintbrush directly from the inkpad and then brushing it on the design.

Examples


Saturday 6 October 2012

FLORAL SKETCHBOOK PLAYTIME Part 3

This time I coloured some of the Floral Sketches with watercolour paint.
Once again the sketches were printed on inkjet watercolour paper and the design was cut out and sprayed with water before painting.

Examples


FLORAL SKETCHBOOK PLAYTIME Part 2

Today we'll look at another way of colouring the Floral Sketches...this is for the hybrid crafters among you.

the Radiant Rain Shimmering Mists and Perfect Pearls give stunning results. Both are mica based sprays but the Radiant Rains have a dye instead of a colourless fluid like the Perfect Pearls.

I have found that inkjet watercolour paper is nice to print on...it can be moistened and behaves like artist's watercolour paper. I believe you can print on to blotting paper which gives nice blending effects bit I've not tried it yet.

So I printed some of the Floral Sketches on to inkjet watercolour paper and cut the designs out. There is a grey outline round the flower...cut inside this line...it is there to mark the flower edge on the lighter areas.

Spray with water and then spray or brush the Shimmering Mists on to the flower (spray a bit in an ice cube tray to act as palette then you can mix the colours if you wish).

Dry the flowers with a heat gun or place on a radiator. You may need to flatten them under somthing heavy if they warp too much.

Examples


Centre brushed with Shimmering Mist, the the whole lily sprayed with Perfect Pearls (the white mica one).


Friday 5 October 2012

FLORAL SKETCHBOOK PLAYTIME Part 1

It's time to play!!!
I shall start with colouring the floral sketches (from Floral Sketchbook 1) digitally.
I must mention that I have never really coloured an image digitally so this is a learning experience for me!!!
This is as far as I have got...in CAP2


I started with a small brush, a colour and about 50% transparency (so as not to obscure the shading already present on the sketch) and began colouring each petal....I am not very patient so then used a very large brush (around 70 - 100) and 50% transparency and coloured the whole flower with a few brush strokes!
I grouped the colur and clematis together. Then I made a stencil from the uncoloured flower, placed this under the grouped image and cut...a pink clematis.
Then I returned to a smaller brush and 50% transparency to colour the flower centre and the markings on the petals.


A lot of petals in this dahlia so this time I created a radial gradient circle.
First I cretaed a circle and filled it with the colour I wanted for the centre. Clicked on Fill (on right of toolbar) and then 'three colour' in the fill editor (on the left side of the toolbar).
Clicked the 'three colour' bar agin and then 'radial'. The circle then had 3 colours. By clicking on the small circles to change the colours and moving them up and down I got the gradient I wanted.
I placed the uncoloured dahlia sketch under the gradient circle and altered the transparency to get the intensity I wanted. Grouped the circle and dahlis and then used the stencil as above.

Thursday 4 October 2012

NEW DIGIKIT!

We have a new digikit out today...FLORAL SKETCHBOOK 1
If you like colouring designs then this is the kit for you!

You will need a graphics programme such as CAP or MCS.


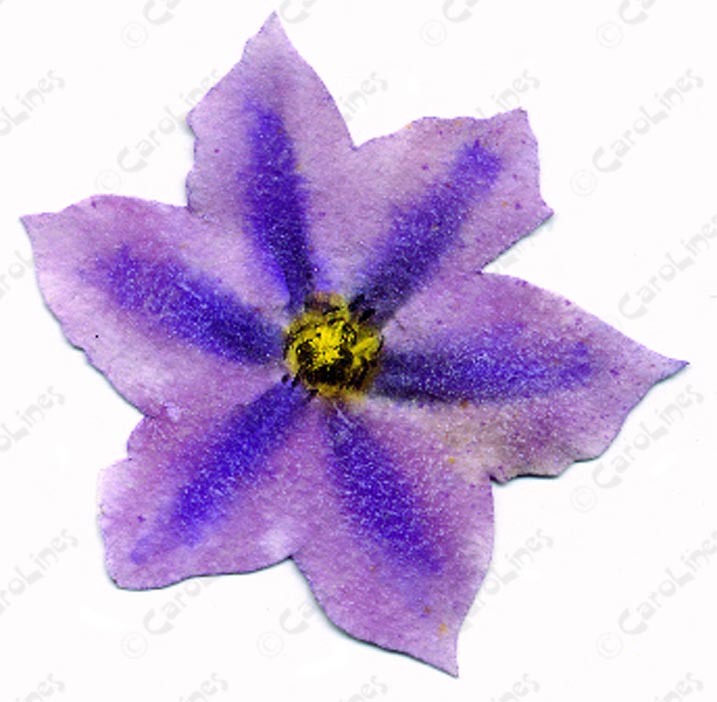
The digikit has 11 digital Floral Sketches including Blossom, Clematis, Dahlia, Geranium, Helenium, Hibiscus, Lily, Magnolia, Cape Daisy, Sunflower and a bonus flower...Poppy.

The digikit also has coloured examples, instructions and ideas.
Images are high quality png at 300 dpi.
Zipped Folder 6.66 MB


Once printed on to card you can colour them with most media...there are so many on the market you shouldn't have a problem deciding which to use!
Once coloured, the designs can be used to make greetings cards, scrapbooks etc.

FREEBIE!!


Just right click and save!
There is a grey outline around the design...cut inside this line.
This poppy coordinates with the Poppy Parade digikt.


Wednesday 3 October 2012

CD SUNDAY CHALLENGE

This week's CD Sunday Challenge is...Tea Time
This is my entry


The card has been constructed in CAP2.
The background is from Debbi Moore's Shabby Vintage Papers CD.
The invitation, teapot and cups are from Pam LeFors Tania's Tea Party digikit.
The 'steam' and fringe  are CAP2 brushes.