Sunday 27 March 2011

Ooh La La Challenge

This week's Ooh La La Challenge is...Mother's Day
This is my entry


The paper and pattern on the fan is from Ooh La La's Fleur D'Imagination. The fan is one of
CaroLines Digistamp Fan templates printed over the patterned card.
Message from CaroLines rubber stamps.

Wednesday 23 March 2011

CD SUNDAY CHALLENGE

This week's CD Sunday Challenge is ...Wild Thing
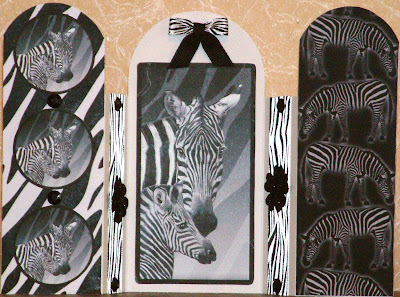
This is my entry


The Zebras are from Peerless Designs...Cuddle Up. The card is from Hunkydory. Ribbon and bow from The Ribbon Box.

Tuesday 8 March 2011

Ooh La La Challenge

This is my entry for Ooh La La's Challenge...It's a Man Thing


Well...it must be a man thing fighting dragons...a woman wouldn't be so stupid!
The image and papers are from Ooh La La's Dreams of Tranquility.
Image stuck to double sided sticky paper and then on to starry hologram card.
Good way to use up those square gems!

Sunday 6 March 2011

SILHOUETTE CARD 3

SILHOUETTE CARD 3


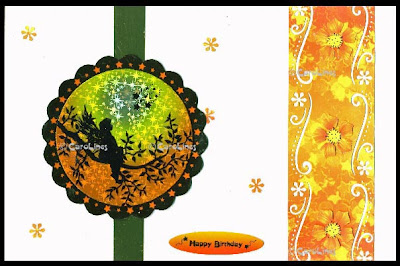
The green stripe is actually gold card!
This card uses images from Silhouette Collections 1 ( Digikit download)...Treetop Sunset
You will need:
White greetings card approx. 8.25 ins x 5.5 ins
Good quality computer card and paper
Gold mirror card
Printable acetate
Embossing ink eg. Versamark and clear embossing powder
Double sided sticky paper
Hologram card
Punch...EK Success Flower and Flourish Edger punch used here
Paper flowers or similar
Message from DIG025 Silhouette Pyramage Sunset (optional)

1. Import silhouette background 1b2 into your graphics programme. Import the silhouette frame sf1 and position over the background. Import the fairy f2, resize and position her on the branch. Lastly, import the Star Trails 1im2 and position in the sky. Group together. See figs 1, 2 and 3. FLIP the scene horizontally and print on to acetate.
                                            fig 1                            fig 2                             fig 3

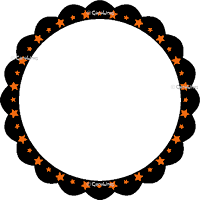
2. Import 1fr1, resize and position the star ring 1sr22 inside the frame and then group. Print the frame on to 250gms card and cut out. See fig 4.


fig 4

3. Print paper 1P7 on to paper.

4. Stick the acetate silhouette scene on to double sided sticky paper and then on to hologram card. Cut round the circle.

5. Ink the scalloped frame with Versmark ink and emboss with several layers of clear powder. When cool, glue the silhouette scene in the centre.

6. Cut a strip of the starry paper, measuring approx. 2 ins  x 5.5 ins and punch out a border on either side. Glue this to the right hand side of the greetings card. Save the flowers from the punched paper.

7. Cut a strip of gold mirror card approx. .75 ins x 5.5 ins and glue to the card.

8. Glue the silhouette in the centre of the gold card and then glue the small punched flowers around it.

9. Cut the message from DIG025, emboss several times with clear powder and glue to the card.

10. Decorate the paper strip with the paper flowers.


Wednesday 2 March 2011

SILHOUETTE CARD 2

SILHOUETTE CARD 2


This card uses images from Silhouette Collection 2 ( Digikit download) and swifts from Collection 3.

You will need:
A computer graphics programme such as MCS, Serif Scrapbook Artist or Serif CraftArtist
Good quality computer card and paper
Greetings card approx. 6.5 ins x 6 ins
Black and silver card
A scalloped circle approx. 3.5 ins diameter (optional)
Martha Stewart punches...Flower Link edger and Doily Lace deep edger
Clear and clear glitter embossing powders
Glossy Accents
Clear fine glitter

1. Import the background 2b3 and size to about 3 ins diameter. Then import the woodland silhouette scene,
s f2, and position over the background, see fig 1. Import the fairy, f3, resize and position her in the scene, see fig 2. Import leaf 2 im5, resize and position at the end of a tree branch. Copy, paste and rotate the leaf to fill the tree as much as you wish, see fig 3.

                                           fig 1                             fig 2                            fig 3

   Import the swifts design from Collection 3, resize and position in the sky, see fig 4. Group the images.

2. Import the pink glitter circle frame, 2br1, resize so it falls on the black circle around the scene, see fig 5. Copy and rotate to form a continuous line of glitter beads, see fig 6. Group the images.


                                           fig 4                             fig 5                             fig 6

3. Print the silhouette scene on to 250gm card and cut out.

4. Ink all over the circle and emboss with clear powder. While still hot sprinkle on more powder  and reheat. Repeat until it has a glassy appearance.

5. Ink the pink scalloped circle and emboss with a glittery powder.

6. Import the pink Starry Paper from DIG074 and fade it slightly, using the transparent tool.

7. Glue the silhouette on to the pink scalloped circle.

8. Cut the paper to approx. 5.5 ins square and punch a border top and bottom using the Flower Link punch.
    Glue this to the black card and trim. Glue this to the greetings card.

9. Punch a piece of silver card using the Doily Lace edger punch and glue across the centre of the entire greetings card.

10. Glue the silhouette scene over the centre of the doily chain.